Frequently Asked Questions
Need help? Find the answers to the most frequently ask questions in our knowledgebase.
 Hosting Account Activation and Cancellation
You account is automatically created and activated on the server right after the order completion and you will receive the welcome email with the cPanel login details right away.
If your hosting account is ordered along with domain registration, the DNS servers should be updated to our hosting DNS servers automatically. If not, you will need to update the DNS servers information manually.
Occasionally, due to excessive Gmail/Yahoo/Hotmail/Aol anti-spam filtering, welcome emails can be sent to the spam folder or sometimes lost. If you feel this has happened to you, please contact us online and we will resend your welcome email.
The accounts are activated automatically. It means that package is created on the server right after the order completion and you will receive the welcome email with the cPanel login details right away.
If you order addons or private nameservers the billing team will create them manually and send the email with the information within 4 hours after the order.
Please contact us online and we will resend your welcome email.
Please submit a support ticket with your cancellation request.
 Getting Started
Option 1: From our home page, scroll down to the "Hosting Plans" section and click on the "Oder Now" button for the hosting plan that best fit your need. You will be directed the "Hosting Service" wizard to complete the signup process. Enter a domain name in the field provided if you want to register a new domain name or transfer an existing domain. If you only want to signup for web hosting, click the "Go" button to proceed to the "Hosting Service" wizard page. Click on the "Order Hosting Only" button to signup for web hosting.
Option 2: Please contact us online and we will be happy to help with the signup process.
In order to transfer an existing hosting account to us from your current hosting provider and avoid downtime you will need to do the following:
1) Make a full backup of your site in your cPanel.
2) Order hosting service from our website.
3) Do not cancel your previous hosting account.
4) Once your hosting account is active and you receive the welcome email, login to cPanel use the cPanel file manager to upload your full backup file into your home directory on our server. Then create a support ticket so we can restore your hosting account for you.
Note: If your current hosting provider does not use cPanel on its servers, you will need to create the archives of each part of your hosting account (email, databases, website), upload to your home directory and restore it manually. Unfortunately, our support staff will not be able to assist you with restoration of your backup in this case.
5) After the cPanel full backup is restored, the domain name will need to point to our hosting DNS servers indicated in your welcome email. Our support staff will update you regarding this step on how to proceed.
6) Once DNS propagation is completed, you should verify that you can access your website using your domain name.
7) You may delete the hosting account at your old hosting provider.
Before starting to upload your website files please make sure you change the DNS name servers for your domain name provided in your welcome email.
There are three possible ways to upload your website files:
- File Manager in your cPanel.
- FTP client. Use the following settings for your FTP client:
server address: server_IP, server_hostname or yourdomain.name
username: cPanel_username@sever_IP, cPanel_username@server_hostname or [email protected]
password: cPanel_password
mode: passive
- Web-based FTP client. You may use ftp://username:password@server’s_IP for browser and mange your files this way.
Below you can find detailed information concerning 2 main directories:
/home/your_cPanel_username/ - This is your home directory. All of your files are stored within this directory. Files placed directly in this directory will not be visible on the internet. You will start out in your home when you are connected by FTP.
/home/your_cPanel_username/public_html/ - The public_html directory contains the files for your site. Files in public_html will be visible to public in the internet. Please make sure you have index page in your public_html directory. When creating your index page, you should use one of the following names: index.htm, index.html, index.php, home.htm, etc.
The index page is the local file that automatically loads when a web browser starts and when the browser's "home" button is pressed.
Please make sure you have index page in your public_html directory, otherwise your site will not be shown in the browser correctly. When creating your index page, you should use one of the following names:
- index.html
- index.php
You may also specify which file name should be a home page of your website by editing .htaccess file. Add the following code in the .htaccess file:
- DirectoryIndex required_file_name
'required_file_name' should be substituted for the existing file name. If you want to set up a list of these files, please separate them with a space.
Note: When adding files to your site, it is important that you add them in the right place. For example, you will need to place website files you wish to be visible on the internet within the public_html directory.
Most networks have a firewalls setup to block access to the port(s) required for cPanel.
You should try this link http://yourdomain.name/cpanel or http://youdomain.com, where yourdomain.name is the domain name you ordered when you signup for web hosting.
Unfortunately, the above URLs may cause a problem for some users as it attempts to connect to port 2082; this is an uncommon port and may be blocked by corporate and public firewalls, thus preventing access by the user.
If the URL above does not work, try accessing cPanel using the following link:
http://cpanel.yourdomain.com
This particular link does not connect using an uncommon port and will allow access.
Please make sure you have hosting with us and received a welcome email with your login details to cPanel.
Occasionally, due to excessive Gmail/Yahoo/Hotmail/Aol anti-spam filtering, welcome emails can be sent to the spam folder or sometimes lost. If you feel this has happened to you, please contact us online and we will resend your welcome email and check the status of your web hosting account.
 cPanel
1) First login to your cPanel account.
2) Scroll down to the Mail category menu and click on "Email Accounts".
3) Enter a email name in the Email field that comes before the @ sign.
4) If you have multiple domains you may select the correct domain if the drop down menu appears.
5) Enter a password or use the Password Generator to create a very strong password (Recommended)
6) You can leave the Mailbox Quota to 250MB or choose Unlimited.
7) Click the Create Account button to create the email account.
An Auto Responder allows you to automatically send a response to all incoming emails to a specific email address.
To create an Auto Responder login to your cPanel and find the mail menu:
Click on "Auto Responders".
Every file and directory on the system is owned by a specific user and group and has permissions that allow performing the particular actions with this file or directory. When one of these settings is not set up properly, you will get this error message. There are several reasons why you may receive such an error.
1. Either the owner/group or permissions are not set up properly. This is the first item that should be checked.
2. The .htaccess file executes the code that contains incorrect redirect settings. Probably the redirect is set up to the file/directory with the wrong owner/group or permissions. Also there may be the following line in the .htaccess file that causes such an error:
- Options -Indexes
To resolve this issue the line should be removed.
Solution: You should check the permissions of the index.html file. You may check and set them using File Manager that is located in your cPanel account. The permissions of files should be 644.
Using the automatic full backup script provided below you will be able to make automatic backup of your hosting account (domains and MySQL databases). This backup script includes SSL support. This is not necessary if you run the script on the server for which you are generating the backup; but the SSL support could be important if you are running the script somewhere else to connect to your cPanel hosting account.
To schedule the script to run regularly, save it as fullbackup.php in your home directory and enter a new cron job** like the following:
00 2 * * 1 /usr/local/bin/php /home/youraccount/fullbackup.php
(Runs every Sunday night at 2:00 a.m.)
That’s it!
Note: We do not provide code debugging services. This script is provided as a matter of courtesy for your convenience only.
Login to your hosting account from our home page by clicking Customer Login at the top of the page.
Click on the Services menu and choose Add New Services.
Choose the hosting package and click Order Now to add a new domain to your hosting account.
Unfortunately, there is no way to merge two or more cPanel accounts into one account automatically.
Please submit a support ticket with your cPanel account merge request.
1) Login to your cPanel.
2) Go to the File Manager under Files menu
3) Go to the file or folder that you need to change.
4) Choose the name of the file or folder you need to change the permissions for.
5) Click on the Change Permissions link at the top of the File Manager page.
6) Choose right file/folder permissions by clicking on tick boxes. The permission values underneath the tick boxes are updated automatically.
7) Click on Change Permission button when you are satisfied with the permissions changes. The new permissions have now been saved.
The users' web statistics on our servers are updated every 24 hours. This update may be delayed by high server load or software problems.
If your statistics have not been updated for more than 24 hours, please, create a support ticket with the your hosting account username and domain you are trying to generate the statistics for.
You can manage all PHP settings with the help of your local php.ini file. To use it you should just create a php.ini file under a folder that contains your PHP scripts that has necessary PHP settings.
For example, if you need to change the upload_max_filesize or register_globals for one of your scripts under your public_html, you should create a php.ini file under the folder with the following content:
- [PHP]
- upload_max_filesize = 8M
- register_globals = On
You can create unlimited email accounts.
You have to upload the files for an addon domain to the addon domain's directory.
When you create a new addon domain you are asked to specify its directory, you can create any directory you wish, however by default cPanel creates directory with the subdomain name. If you are not certain which directory to use, login to your cPanel and go to the Domains section. Next to each addon domain you will find its directory name.
When you upload your content through cPanel's file manager, you will be asked which directory to go to first. There you can choose addon domain root folder.
Custom error pages can be created from cPanel -> Advanced -> Error pages.
Once you create them you should create .htaccess file in the public_html directory containing one of the lines below:
- For custom 404 error page: ErrorDocument 404 /404.shtml
- For custom 500 error page: ErrorDocument 500 /500.shtml
Custom error pages are displayed when a user enters a wrong URL, an outdated URL or when the user is not authorized to access a specific directory of your web space.
Error Pages consists of the following five types of errors:
- 400 (Bad Request)
- 401 (Authorization required)
- 403 (Forbidden)
- 404 (Wrong page)
- 500 (Internal server error)
To customize the error page first choose the domain -> choose the error page number (400, 401, 403, 404, 500) or the error page name (Bad Request, Authorization required, etc). When the page loads the following tags can be put into your error page:
- Referring URL - Displays the url of the web site the visitor was previously viewing.
- Visitor's IP Address - Displays the IP address of the visitor viewing the error page.
- Requested URL - Displays the intended url the visitor is trying to view.
- Server name - Displays the web site's server name.
- Visitor's browser - Displays the visitor's browser type such as IE, FireFox, Netscape, etc.
- Redirect Status Code - This displays the type of code in the 300-307 range.
Choose the desired tags and press ‘Save’ button. Your Error Page is ready.
You can create a redirect for a domain, single page or directory.
1. Login to your cPanel account.
2. Click on the Redirects icon from the Domains category.
3.You’ll first need to determine the type of Redirect:
- Permanent redirect has a status code of 301 and is cached in the browser memory. 301 redirects are permanent. This means that the page has moved, and they request any search engine or user agent coming to the page to update the URL in their database.
- Temporary redirect (as the name suggests) are not permanent redirects, which means that the page is sending status code 302 to the browser. The 302 code tells the browser not to cache this redirect into its saved data. This is the recommended type of redirect, unless you are absolutely sure that you will never change it in the future.
Next, you can allow any of the domains on your account to redirect to another web site or you can specify a domain.
4. Then you can enter the name of the directory you want to serve as your redirect URL.
5. The final field asks the ACTUAL web site address (not including the http://) that you want the visitor to be redirected to.
6. We recommend leaving the final two options as is and clicking on the Add Button.
Sometimes the above redirects may loop and show errors. In such cases we recommend plain html or php redirects.
The subdomain is required for the addon to work properly and should not be removed.
Parked Domains can be pointed to your main site /public_html folder only. If you want to point your domain to a specific subfolder in your account, you have to use Addon domain option.
There are two possible ways to access your FTP server:
- FTP client. Use the following settings for your FTP client:
server address: server_IP, server_hostname or yourdomain.name
username: cPanel_username@sever_IP, cPanel_username@server_hostname or [email protected]
password: cPanel_password
mode: passive
- Web-based FTP client. You may use ftp://username:password@server’s_IP for browser and mange your files this way.
Below you can find detailed information concerning 2 main directories:
/home/your_cPanel_username/ - This is your home directory. All of your files are stored within this directory. Files placed directly in this directory will not be visible on the internet. You will start out in your home when you are connected by FTP.
/home/your_cPanel_username/public_html/ - The public_html directory contains the files for your site. Files in public_html will be visible to public in the internet. Please make sure you have index page in your public_html directory. When creating your index page, you should use one of the following names: index.htm, index.html, index.php, home.htm, etc.
1) Login to your cPanel account.
2) Scroll down to the Logs category menu and choose from any of the statistical tools.
PHP5 is already running on our hosting servers.
You can turn on register_globals in your php.ini file. To do this, create a php.ini file in the directory where the changes need to made. Then add the following line to your php.ini file:
- register_globals = On
Note: The php.ini file should be added to every directory and subdirectory where the changes are required.
Unfortunately, you can’t add addons this way. You would need to change name servers for your domains first and only after that you will be able to create the addon domain in your cPanel.
Yes, Softaculous is installed on our hosting servers. You can access all scripts available with Softaculous from your cPanel account.
In cPanel you can import and export databases using PHPMyAdmin, which you can find in the Domains category menu.
Note: Only databases of 50MB maximum, can be imported and exported in PHPMyAdmin. Larger databases have to be imported and exported via SSH.
1) Login to your cPanel account.
2) Scroll down to the Domains category menu and choose Subdomains.
3) Enter the following details for your subdomain:
- The name of your subdomain.
- Choose the domain you need to create from the drop-down menu.
- The root directory for your subdomain.
4) Click the Create button.
1) Login to your cPanel account.
2) Scroll down to the Subdomains category menu and choose Domains.
3) Enter * in the Subdomain field.
4) Click on the drop down menu to select the domain to assign the wildcard.
5) Enter the path where you will upload the website files. (/public_html/ or /public_html/subfolder/)
6) From the cPanel home page scroll down to the Domains category menu and choose Advanced DNS Zone Editor.
7) Make sure that there is an A record for *.yourdomain.com created and pointed to the server IP address.
1) Login to your cPanel account.
2) Scroll down to the Mail category menu and choose Fowarders.
3) Click on the video tutorial for additional help on email forwarding.
Please submit a support ticket for additional assistance.
Please submit a support ticket for additional assistance.
Add a new record.
1) Login to your cPanel account.
2) Scroll down to the Domains category menu and choose Advanced DNS Zone Editor.
3) Click on the drop down menu to select the type of record to create.
4) Enter a domain with an optional period at the end in the Name field.
5) Enter the number of seconds in the TTL field. This must be a positive integer in seconds.
6) If adding an A record enter an IP address in the Address field.
If adding a CNAME record enter a valid zone name.
If adding a TXT record enter the TXT Data.
7) Click on the Add Record button to add the record.
Edit an existing record.
1) Login to your cPanel account.
2) Scroll down to the Domains category menu and choose Advanced DNS Zone Editor.
3) Click edit next to the zone file from the Zone File Records list.
4) Enter the values that need to change and click edit record to save changes.
1) Login to your cPanel account.
2) Scroll down to the Mail category menu and choose MX Entry.
3) From the MX Records section click edit next to the record you wish to edit.
4) Make the necessary changes and click the Edit button to save changes.
- Allows you to have your own Private SSL Certificate
- It is good for an email sender’s reputation
- Gives you better delivery rates
- Receive better scam and spam blacklist protection
- It is good for business identity
- Provides extended hosting functionality
- Search bots index your website faster
- Access to your website anytime you need using the IP address
- It provides a higher stability
 Domain Name Servers (DNS)
If you register a new domain with us along with purchase of your hosting package, our hosting name servers will be configured for your domain automatically.
Our name server are:
- NS1.KLINEITSOLUTIONS.COM
- NS2.KLINEITSOLUTIONS.COM
If your domain is registered with another registrar, you will need to configure the DNS at their end, please contact them for exact instructions.
Once the name servers have been setup, please allow 24-72 hours for the DNS changes to propagate worldwide.
Our resellers have an opportunity to use their own private name servers.
In order to get private name servers please open a support ticket. Provide your account information and the name servers you would like to have setup.
Addon and parked domain names should use the same name servers as your main domain.
You can find name server information in your welcome email.
If your domain name is registered with any other company please contact your domain registrar in order to make the necessary name server changes. Supply your domain registrar with the name server information provided in your welcome email.
 Email
Email
1) First login to your cPanel account.
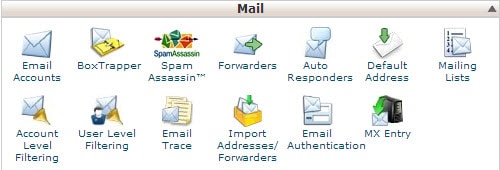
2) Scroll down to the Mail category menu and click on "Email Accounts".
3) Enter a email name in the Email field that comes before the @ sign.
4) If you have multiple domains you may select the correct domain if the drop down menu appears.
5) Enter a password or use the Password Generator to create a very strong password (Recommended)
6) You can leave the Mailbox Quota to 250MB or choose Unlimited.
7) Click the Create Account button to create the email account.
To set up an email client please use the following basic configurations.
- Username: your e-mail address
- Password: the password set in cPanel during e-mail account set-up
- Incoming server type: IMAP or POP3
- Incoming server (IMAP): 993 port for SSL, 143 for TLS.
- Incoming server (POP3): 995 port for SSL, 110 for TLS.
- Outgoing server (SMTP): 465 port for SSL, 26/587 port for TLS.
We do not at present have any restrictions for sending out emails.
That said, we do monitor for abuse and will make adjustments accordingly.
We have SpamAssassin installed on our hosting servers which you can easily enable and configured through your cPanel.
1) First login to your cPanel account.
2) Scroll down to the Mail category menu and click on SpamAssassin.
3) If SpamAssassin is currently disabled, click the Enable SpamAssassin button.
4) Under Filters leave the default Score of 5 and click the Auto-Delete Spam button to enable Spam Auto Delete.
5) Under Spam Box click Enable Spam Box to enable the Spam Box.
6) To configure the different additional settings for Spam Assassin click the Configure Spam Assassin button
Yes, all hosting accounts include Horde, Squirrelmail and RoundCube webmail interfaces.
You can access webmail using the following links:
- http://domainname.com/webmail
- http://webmail.domainname.com
- http://domainname.com:2095
- https://domainname.com:2096
You can create an unlimited amount of email accounts.
By default there is no size limit (beyond the users email account size).
Yes, it is possible to create email accounts for parked/addon domains.
1) First login to your cPanel account.
2) Scroll down to the Mail category menu and click on Email Accounts.
3) Under "Add a new email account" in the drop down menu of the Email field you can choose the parked/addon domain you like to create an email for.
The default email address created when your cPanel account was setup will "catch" any mail that is sent to an invalid email address for your domain.
 Secure Socket Layer (SSL)
An SSL certificate allows you to apply SSL encryption technology to your site, so that information traveling from it is encrypted. SSL certificates are expected by consumers for any site that handles sensitive information like identity information, credit card numbers, or confidential records.
An SSL certificate is a file installed on the web server that a web site is running on. This file is composed of two segments. The first is the public key, which encrypts data. The second is the private key, which decrypts data. When a client, such as a web browser, connects to an SSL secured server a unique session is created using these two keys. All data transmitted during this session is protected, and cannot be decrypted by any party other than that specific client and the server.
SSL certificate requires a dedicated static IP address for installation.
No, we do not provide shared SSL certificate for hosting accounts. To secure your hosting account you will need to purchase an SSL certificate.
Installing a certificate is not difficult, but it does involve a process that's specific to each individual web server. Certification Authorities publish instructions for generating the Certificate Signing Request (CSR) and installing the certificate.
Please submit a support ticket if you would like to purchase a dedicated IP address and SSL certificate for a website hosted on our servers.
 SSH Access
Secure Shell or SSH is a network protocol that allows data to be exchanged using a secure channel between two networked devices. The two major versions of the protocol are SSH-1 and SSH-2.>/p>
SSH was designed as a replacement for Telnet and other insecure remote shells (rlogin, rsh, rcp, and rdist), which send information, notably passwords, in plain text, rendering them susceptible to packet analysis. The encryption used by SSH is intended to provide confidentiality and integrity of data over an unsecured network, such as the Internet.
SCP means a Secure Copy. It is a method of remote communication and sending files between networks, but having the sent files secured with the SSH (Security Shell) protocol. It allows to transfer files without information leakage. SCP is a substitute for the legacy `cp` file transfer application.
SFTP stands for Secure File Transfer Protocol. This is an application which uses Secure Shell in relocating files. It avoids the plain transmission of data and it does not only protect the information, but also encrypts the commands. SFTP is a substitute for the `ftp` - file transfer protocol.
Yes, please submit a support ticket to get jailed SSH enabled for your account
To access your account via SSH you should download and install one of available SSH clients. You can find the list of free SSH clients below. If you have Windows, we recommend to use “PuTTy” as your SSH client.
- PuTTY (Windows/Unix)
- WinSCP (Windows)
- Fugu (Macintosh)
- Cyberduck (Macintosh)
 FTP
FTP
We recommend the following FTP clients:
- FileZilla (Windows)
- CoreFTP (Windows)
- Cyberduck (Macintosh)
1) First login to your cPanel account.
2) Scroll down to the Files category menu and click on FTP Accounts.
3) Under Special FTP Accounts click Configure FTP Client next to the FTP account you want to configure.
4) Here you will find manual settings and configuration files for each of the recommended FTP clients.
 Database
In cPanel you can import and export databases using PHPMyAdmin, which you can find in the Domains category menu.
Note: Only databases of 50MB maximum, can be imported and exported in PHPMyAdmin. Larger databases have to be imported and exported via SSH.
SSH access is disabled on hosting accounts by default.
Please submit a support ticket to get SSH access enabled.
To import a database, please, use the following command:
- mysql -uusername –ppassword database_name < /path/to/file/file.sql
To export a database, please, use the following command:
- mysqldump -uusername –ppassword database_name > /path/to/file/file.sql
username – the name of a database user assigned to the database ( it should be in the format CPANELUSERNAME_DATABASEUSER ), or your cPanel username
password - the database user password ( if you used database user username ), or your cPanel password ( if you used the cPanel user as the username )
database_name – the name of the database you are importing to or exporting from. It should be created in your cPanel. The format is the following: CPANELUSERNAME_DATABASENAME
/path/to/file/file.sql – the path to the mysql dump file, that you are importing to ( then a new file will be created ) or exporting from your cPanel account. Here you can use both relative and absolute path formats. If you are located in the folder with the file you can just type the file name with the extension. With absolute path, for example, it will be /home/CPANEL_USERNAME/public_html/file.sql
If you don't receive any errors after pressing Enter key, this means that the command was performed successfully.
IT CONSULTANT
WEB HOSTING
COMPANY
HELP & SUPPORT
BUSINESS HOURS
MON - FRI 9:00 A.M. - 6:00 P.M.
SAT - By Appointment Only
SUN - Closed
Technical Support Portal - 24 x 7 x 365